
Welcome to this free sewing tutorial by Felicity Sewing Patterns. Zigzag stitched elastic shirring is an alternative to the bobbin shirring method. The tutorial shows step by step how to make this useful and and attractive application. All the information you will need to make this adorable little shirred dress, including the pattern instructions, are in the tutorial below.
See the notes at the end of the tutorial for the Shirred Top to match the Silly Frilly Shorts.
Zigzag Stitched Elastic Shirring
The shirring I am going to show you here is not made using shirring elastic on the machine bobbin. This method of shirring is made using narrow width flat elastic which is stitched on in rows using a zigzag stitch setting. I prefer this method because it is much stronger and longer lasting than bobbin shirring. Zigzag shirring gives a more professional finish, it is adjustable and you do not need as much fabric width as with bobbin shirring. Bobbin shirring is softer and most suitable for baby clothes. Zigzag shirring requires accurate, straight stitching, not hard to do if you take care, the results are worth it.
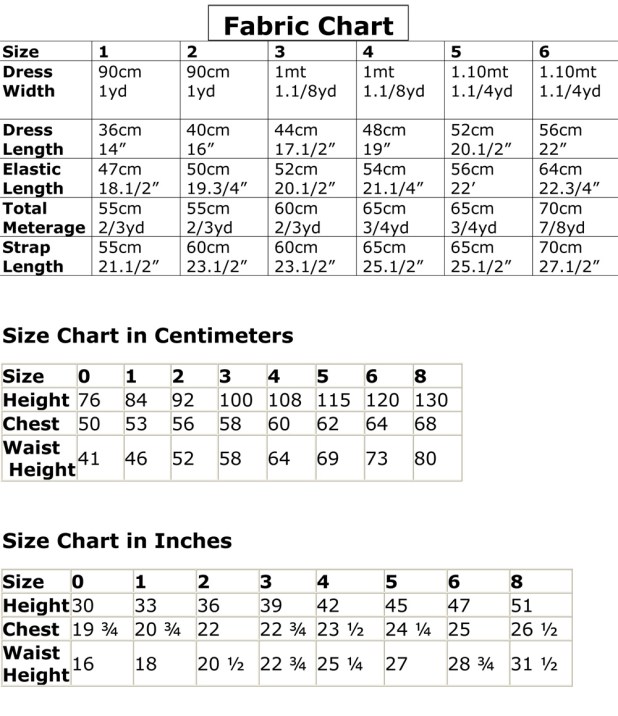
There is no pattern file for this dress as it is just a rectangle of fabric. The table below gives measurements for all the parts required to make the dress in sizes 1 to 6 years old.
The measurements are the basic requirements only; you can add to the width if you want more fullness. The length can be altered to suit a top or skirt without needing to alter the elastic requirements. If you want larger sizes you can add a minimum of 10cms or 4 inches to the width for every additional year of age, plus add length as required. When deciding on your own dimensions, remember to add 4cm or 1.5 inches for the hems at top and bottom.
You can add a contrast border: make this any width you like; 8 -12 cm wide is best depending on the size you are making. Subtract the width of the border from the overall length given in the table and remember to add a seam allowance for the joining seam.
The straps are 7cm / 2.3/4” wide for all sizes and the lengths are given in the table.
The loop: cut a small strip of self fabric 8 x 2.5cm or 3 x 1 inches.
Elastic: the only elastic to use for this method is a flat 3mm or 1/8” wide woven, flat elastic.
Rickrack braid: to fit the width of the skirt. Optional but very effective.
From sizes 1 to 6 you can cut the rectangle in one piece across the width of a 112cm / 45” cloth. The total meterage includes the straps but you will need to take into consideration if you are going to add a border in contrast fabric. Zip down to the end of the tutorial to find the size charts for body measurements in centimeters and inches.
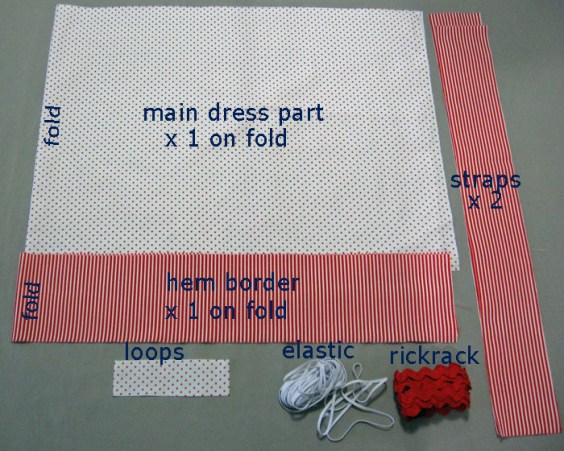
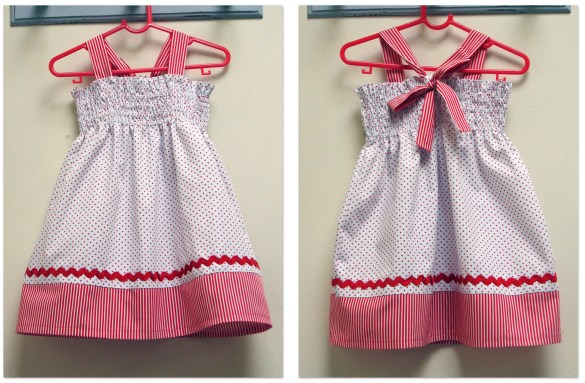
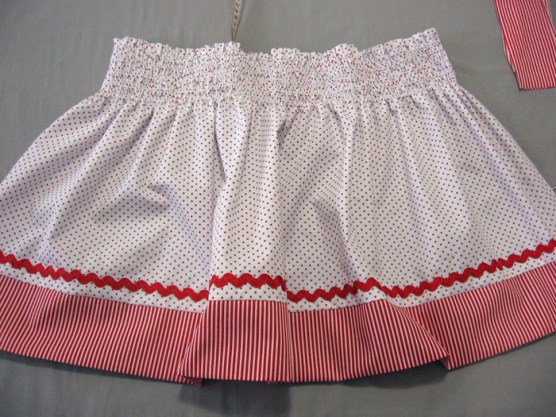
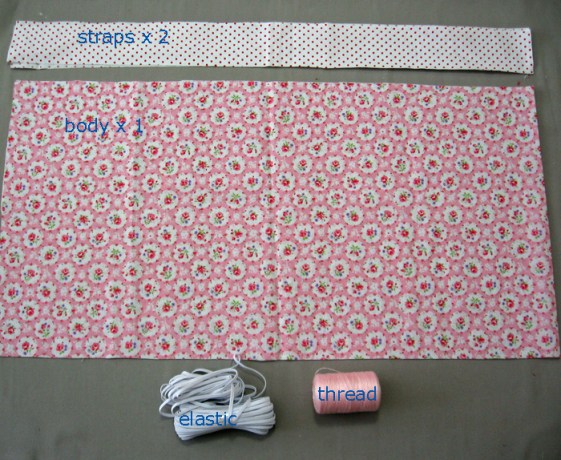
Check the photo to see if you have cut all the parts you will need.
Main skirt piece, Optional border piece, Straps, Loop, Elastic 3mm / 1/8” x 5 rows. You will also need matching threads.
Start Sewing
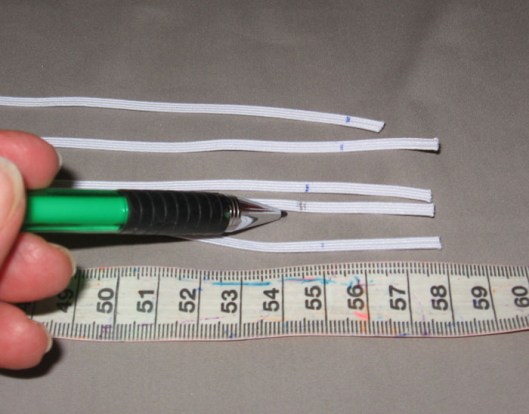
1/ Prepare the elastic strips.
The only elastic to use for this method is a flat 3mm or 1/8” wide woven, flat elastic. Cut the elastic strips with 3 or 4 cm extra on the length of each piece; mark the exact measurement length with a pencil. Prepare 4 to 6 rows depending on the size you are making. I used 5 rows on my size 3 sample. Or you may want to do only 2 or 3 rows.
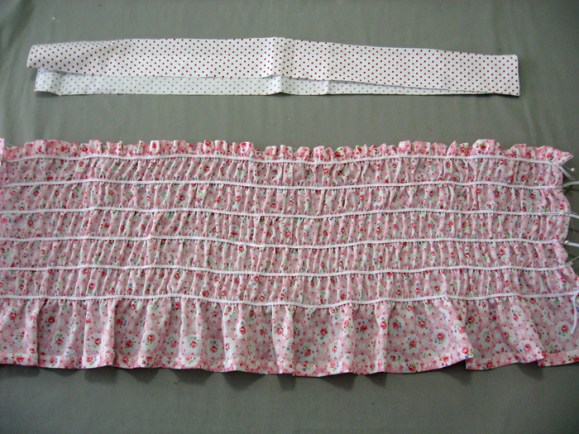
2/ Prepare the skirt: if your dress is in 2 pieces seam these together to form one long piece, overlock the top edge and press under 2cm/ ¾” and stitch this down.
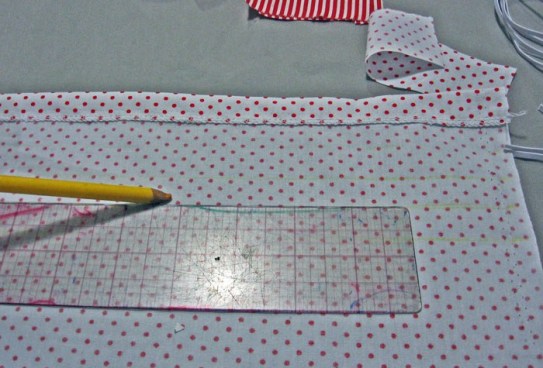
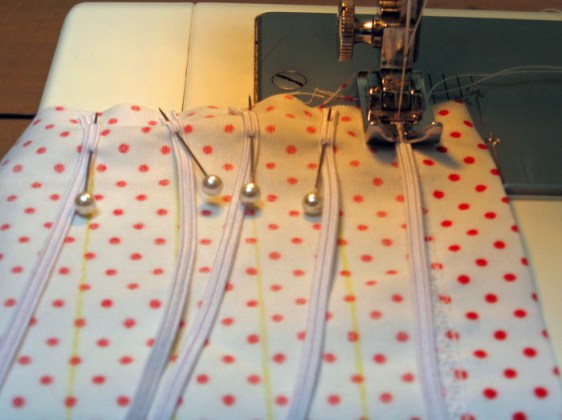
The shirring rows are placed 15mm / 5/8” apart this is equal to 2 widths of the machine foot.
It is easier to sew straight if you mark each row with chalk pencil.
You could place the rows wider apart if you prefer.
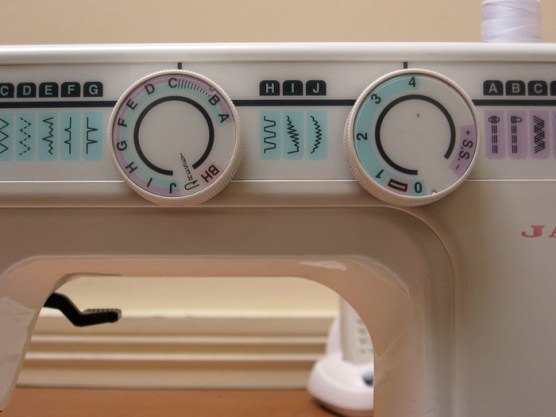
3/ Set the machine: to sew the rows of elastic down you need to set the machine on a large/wide zigzag stitch. The stitch has to be wide enough to span the elastic without stitching it down but actually forming a small channel. Set the zigzag stitch to its widest and set the stitch length to the maximum length. Use plain all purpose sewing thread on the needle and bobbin.
4/ Stitch the elastic rows: flick the machine stitch back to plain stitch. Start at one side seam and sew the ends of all the elastic strips in place where you have marked the rows, back tack a couple of times to secure well.

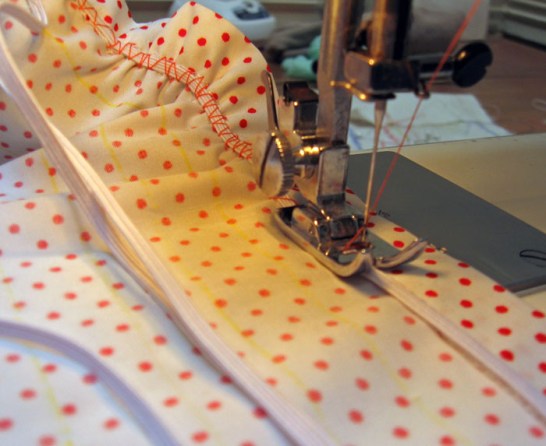
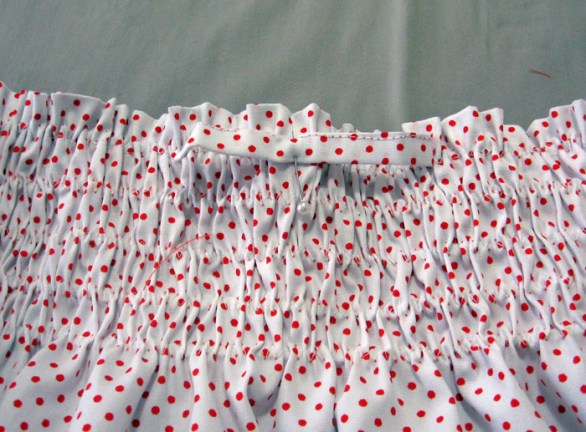
Flick the stitch back to large zigzag and sew the first row along the edge of the hem turning. As you sew make sure that the stitching does not catch the elastic. When you start to run out of elastic, make sure the needle is down and gently tug on the end to pull the elastic through the stitching, keep going like this till you reach the other seam edge. Use a pin to secure the end of the elastic at the mark for the finished length.
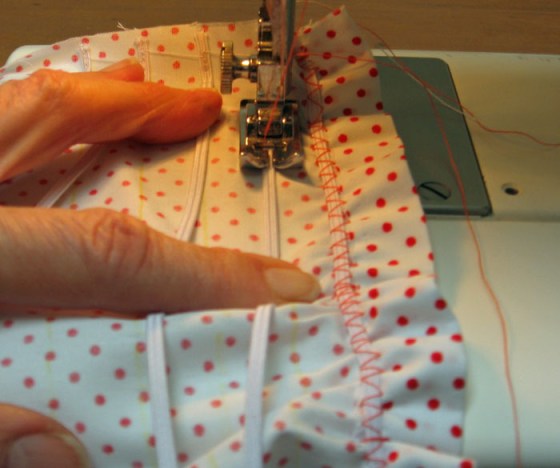
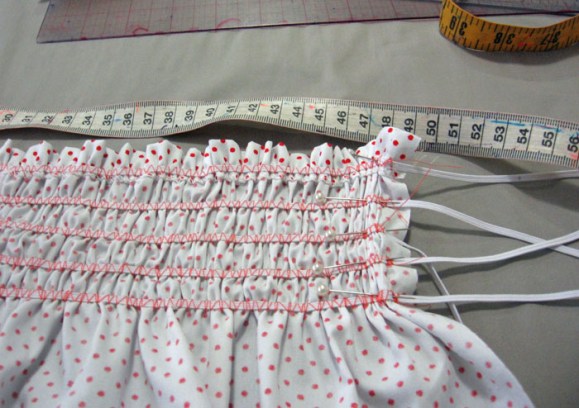
Sew all the elastic rows the same way, make sure to smooth out the fabric as you go so you do not stitch tucks or gathers in with your rows. When you have all rows sewn and secured with a pin at the edge check the size and tension of the elastic now before you sew the loose ends down. The elastic should move freely through each small zigzag channel, so if you want to tighten it up you can pull on the ends. Be careful not to let an elastic end slip back down the channel. To finish set the machine back to the normal sewing setting and stitch each end with a couple of backtracks to secure well.
A good rule of thumb for getting the elastic tension right is to set the finished length about 6 cm / 2.1/2″ smaller than the body measurement e.g. if a size 3 chest is 58cm / 22.3/4″ then set the finished shirring at 52cm / 20.1/4″ this will give enough tension without being tight. Elastic strength can vary so it’s always best to check the finished size before securing the elastic rows.
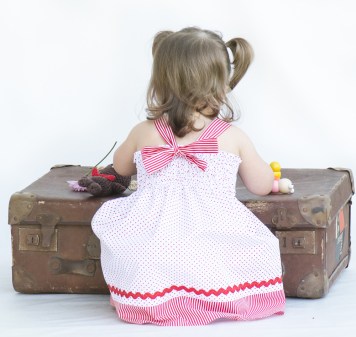
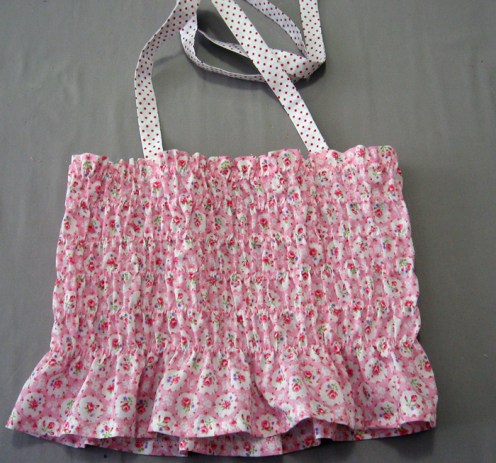
Your shirring is finished and you can complete the dress.
5/ Make the skirt: before you sew up the side seam sew the border on, overlock the seam and press. Next sew the rickrack on using a matching thread for this.
Sew the side seam, overlock and press. Stitch the top part of the seam flat where the shirring is, this will make sure the seam does not rub when wearing.

Press the hem under and top stitch.
Make the straps: fold the straps in half along the length and stitch around the edge. Clip the corners, turn out through the bottom opening, press to get an even edge. Turn the raw end in and stitch closed or overlock to finish.

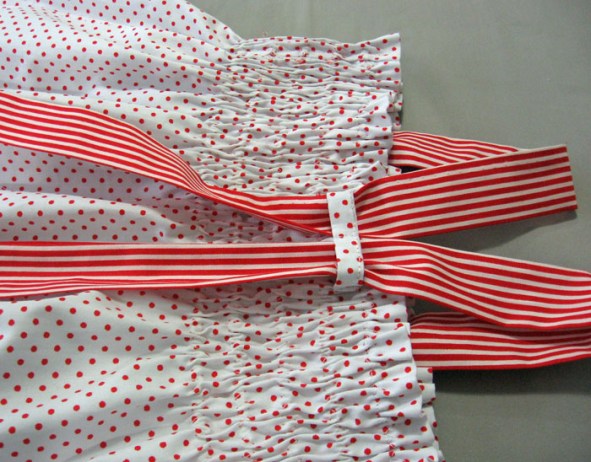
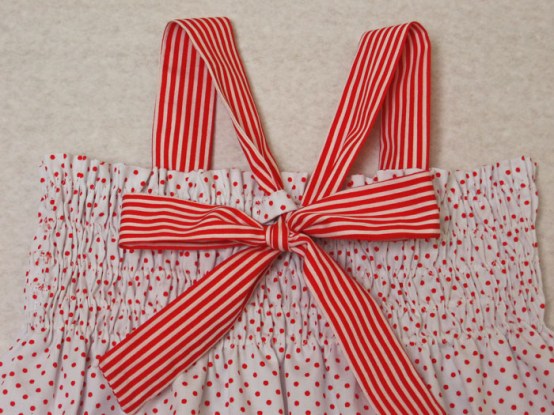
Make the back loop. Double turn the fabric to form a narrow strip and stitch.To attach the loop find the center of the back and pin the middle of the loop in place and stitch down. Stretch the shirring flat and stitch each end of the loop down just below the elastic to form a double loop.
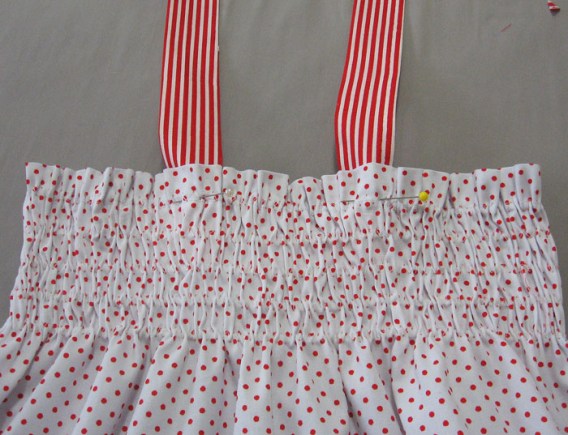
Attach the straps: on the front, locate the center and pin the straps about half way between there and the sides. Sew the straps in place stretch the shirring out when you stitch and sew just above the elastic. Thread the straps through the loops and tie into a bow.
Notes for a Shirred Top
To make the top you can follow all the instructions as given above for the dress. The only difference is that you need to determine what finished length you want your top to be. For my size 6 I halved the length of the dress from 56cm to 28cm [ this includes the hem allowances]. Whatever finished length you decide on you must add 4cm/1.5″ for the hems. You can tie the straps at the back neck halter style or add the loop as shown on the dress to tie the straps at the back bodice.
The shirring rows can also be varied in number and spacing; on my top I spaced my 6 rows 3cm/1.25″ apart.
When plotting out the rows start at the top and space them to fit evenly to end just above the waistline. The number of rows and the width of the spacing will depend on the size you make. You can make a more floaty little top by just doing 2 or 3 rows at the top and leaving most of the body loose. It is easy to add an extra row if needed.
See below for required materials. The main body piece is on the fold.
The lighter the fabric you use the softer and more comfortable the top will be. I used a very lightweight poly cotton. Lawn, voile and poplin are all suitable.
Follow the main tutorial to make the shirring and sew the top together.

Great tutorial
LikeLike
This is by far the easiest and well detailed tutorial i have seen on stirring dress. Thank you
LikeLike
Thanks for the tutorial! Just in time to outfit my two little girls for summertime!
LikeLike