
You can download the Santa Sack tutorial pdf file including the Rudolph applique template from the SHOP go to the Free Patterns shop section on the Menu. The tutorial can be viewed here on the Blog page.
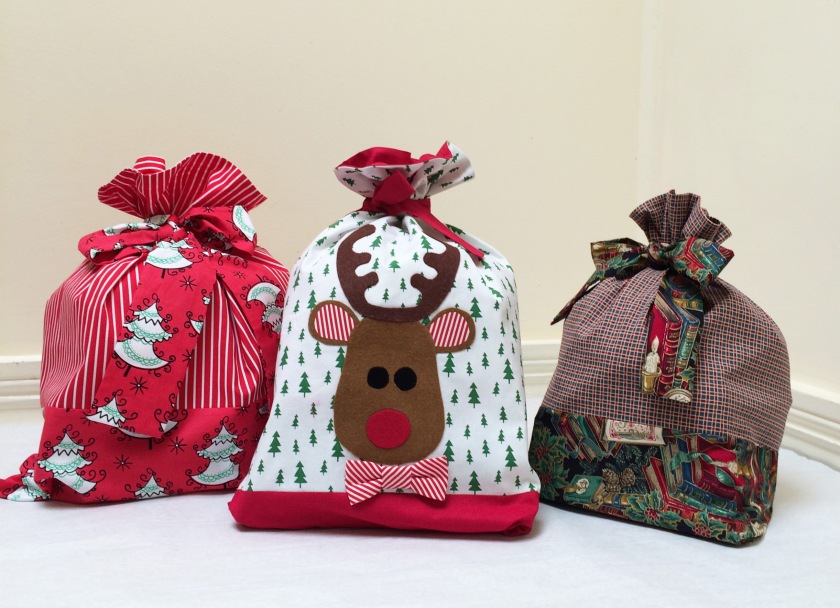
A santa sack can be made any size and with a combination of fabrics plus there is the new free ‘Rudolph’ applique that can also be added to make a fun looking santa sack. The applique can be used in a multitude of ways e.g. on clothing, aprons, cushions, bags etc.
I have made my sacks using two contrasting fabrics but you can make them all in one fabric or using multiple combinations. You can also add braid trims, bells, bows or anything you fancy. I’ve made three sacks to demonstrate; one version has the applique.
MAKE THE RUDOLPH APPLIQUE
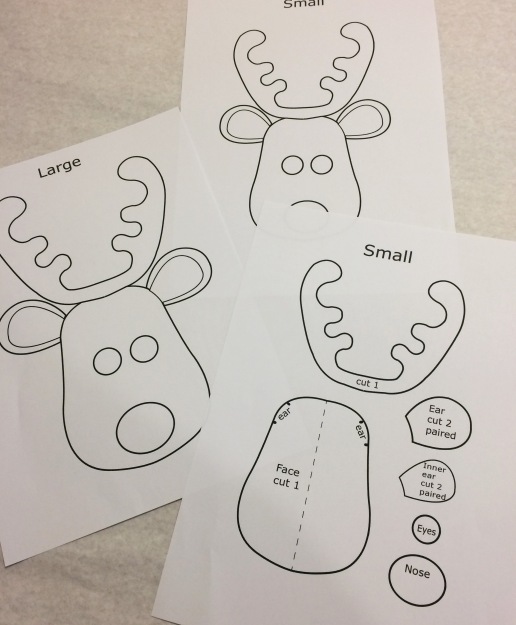
The Rudolph applique comes in two sizes but it can be altered to any size by using the photo copy function on a printer to reduce or enlarge the parts.
MATERIALS REQUIRED TO MAKE THE APPLIQUE
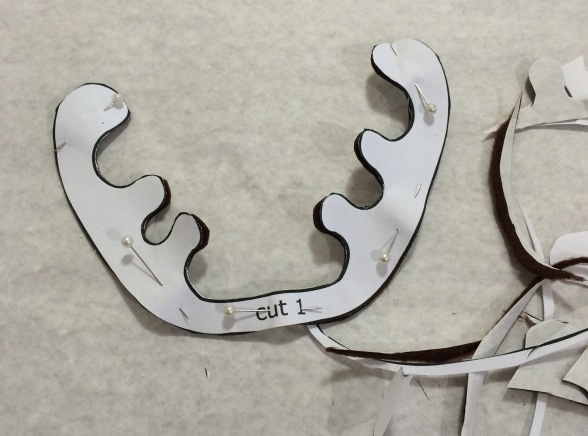
1/ Print out the template pages from the pdf file. Choose the most appropriate size to use.
2/ Fabric in small quantities for the component parts: best fabrics to use are wool felt or solid cottons since they will need to take a hot iron to fuse the applique. Check the template and the photos to see what you will need. I used wool felt for the main parts and added some cotton stripe to the inner ears and for the bow tie. You can use plastic goggle eyes if you prefer.
3/ Applique adhesive backing; about 20cm/ 8″ square. You can buy this at fabric and craft stores.
4/ Printer, sharp scissors, an iron and pressing cloth, a needle and thread, pins.
5/ Cut out the parts for the santa sack as required and press smooth. See below for cutting out and making the santa sacks.
I did not stitch my applique onto the bag as I would have done if I was applying it to clothing where it would get a lot of wear and washing. to see how to stitch an applique by machine take a look at the DUCKIE SKIRT TUTORIAL on this blog page. The other option if you like a handcrafted finish is to attach it with a fine hand stitched blanket stitch around the edges.
1/ Print out the template.
 2/ Roughly cutout the shapes in fabric and adhesive backing. Fuse the fabric [felt] and adhesive with a hot iron. Use a pressing cloth to protect the iron.
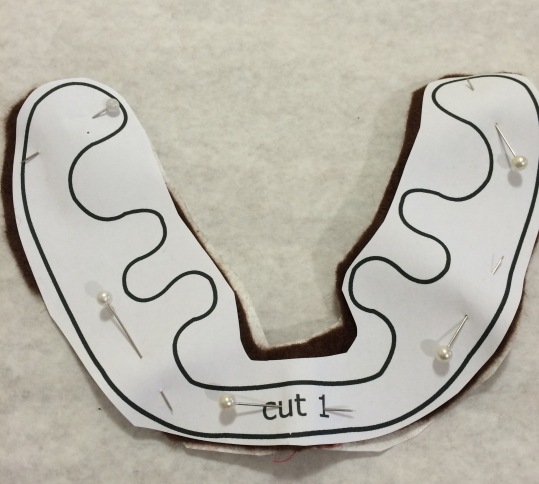 3/ Pin the template in place and using sharp scissors trim the shapes exactly to the template outline. Do this for all the applique parts.
 4/ Work out the position for the applique. For my santa sack I placed it in the centre and 3-4cm / 1-1/4″ — 1-1/2″ up from the bottom edge. Use the printed illustration as a guide to layout all the parts correctly.
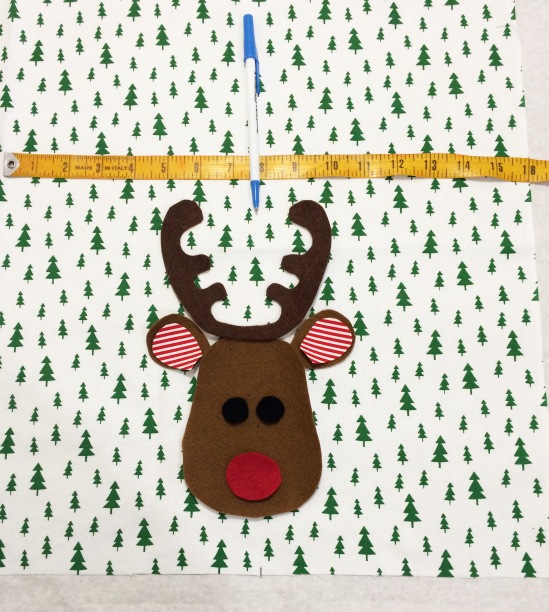
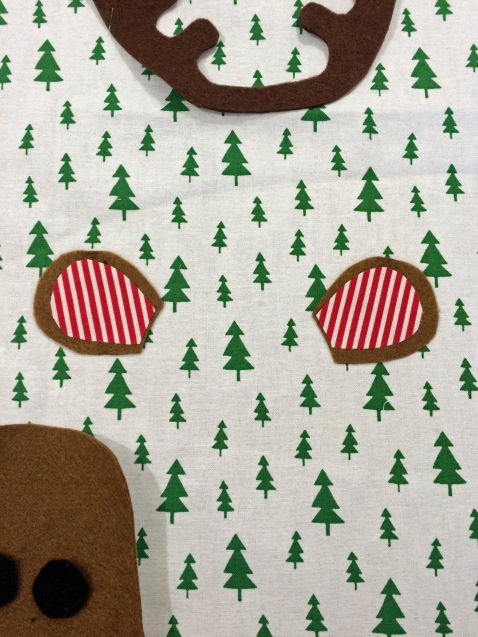
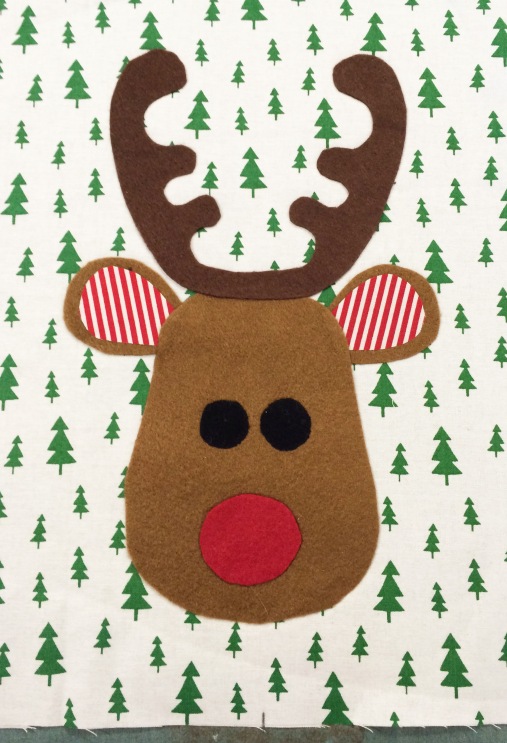
 5/ Fuse the applique parts to the fabric. Peel the paper backing off all the parts. The sequence for fusing on the parts is: ears, face, antlers, nose and eyes. The face should just slightly overlap the ends of the ears and the antlers should overlap the top of the head. Fuse the two ear parts in place first then continue the sequence using a hot iron and pressing cloth. You will need to apply some pressure with the iron.
 If you are going to stitch the applique do this now. It is now ready to complete sewing the santa sack. 6/ Make the bowtie. Cut a strip of fabric 8cm X 20cm / 3-1/2″ X 8″ [ I cut the stripes on bias]. Press the edges to the centre and fold over to form a bow shape. Use a small rectangle of fabric for the keeper and wrap this around the bow and stitch by hand. It’s best to attach the bowtie after the bag is sewn together.
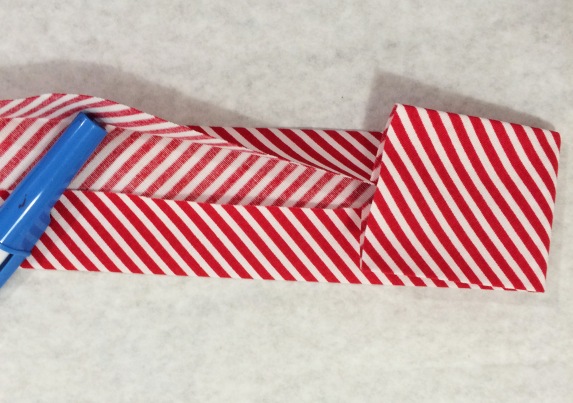
MAKE THE SANTA SACKS The Santa Sacks can be made any size or shape depending on what you want to fill them with: large enough to stuff with toys or small and delicate, just the right size for a bottle of perfume, a jewelry box or a mobile phone. The basic sack is a simple rectangle of fabric sewn together to form a bag with a facing or a deep hem allowance on the top opening. I have made all my bags using two prints but you can vary this to suit. I have added ties to all my bags.
MATERIALS REQUIRED.
1/ Fabric: the amount will depend on the size of the bag so it’s best to work out the overall finished size of the sack first. It’s a good idea to draw this out on paper and then devide it up for a border or whatever combination of fabrics you want to use. Remember to add seam allowances to panels or borders. Fat quarters can work well for the sacks. If you want to make fabric ties include enough for these depending on the width and length of the finished tie.
2/ Thread for sewing.
3/ Trims: optional: add braid or ribbon trims or other decorative effects. Note: you can make the ties or handles using the fabric as I have done or use tape or ribbon instead.
4/ Sewing machine, scissors, pins, tape measure/ruler, iron, paper.
—————————————–
1/ Cut out the sack: I had large enough pieces of fabric to cut my bag in one continuous piece but it can be cut in two parts as in a back and front. The overall finished size of this bag is 50cm high X 40cm wide [approx. 20″ X 16″]. The finished width must be doubled when cutting all in one piece and seam allowances added. I divided the length for a contrast border 8cm / 3″ wide. The facing is 7cm / 2-3/4″ wide or it can be a little wider for a large bag. Alternately allow for a deep hem on the top if you don’t want a contrast facing.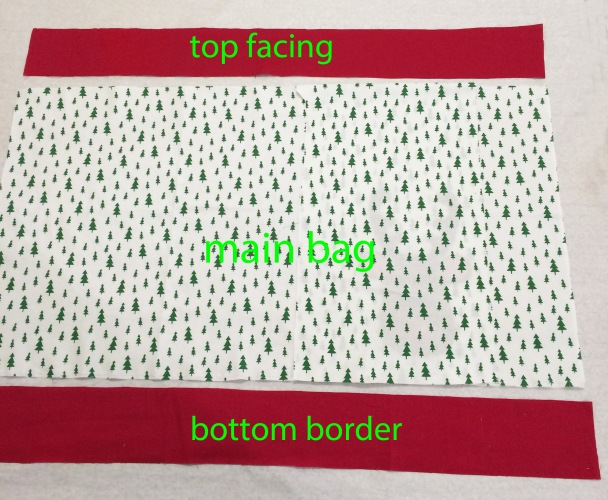 2/ Applique: if using the applique position so that it will be in the centre of one side of the bag and closer to the bottom than top.
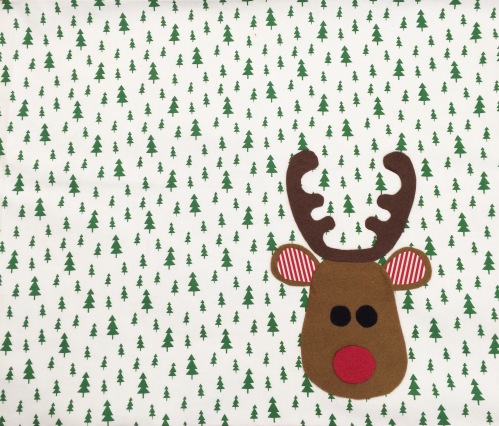 3/ Sew the border to the bottom and the facing to the top edge. Overlock the border seam. Press both seams.
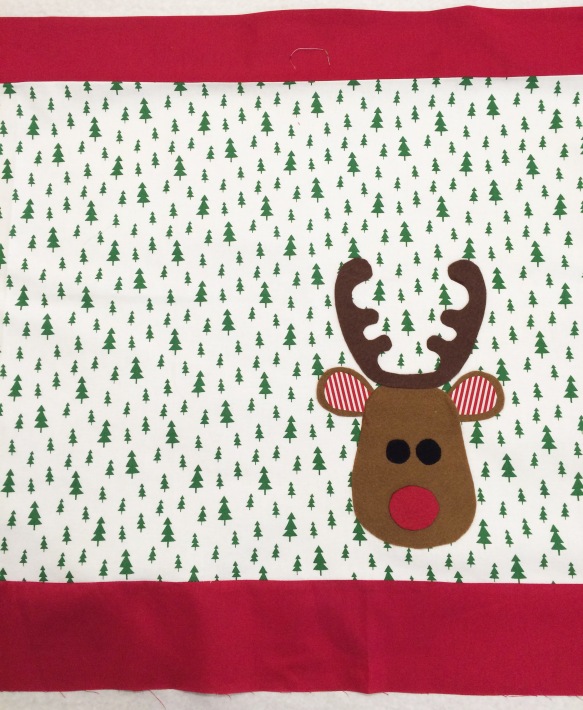 Press the edge of the facing under 1cm / 3/8″. Then turn the facing under and press flat.
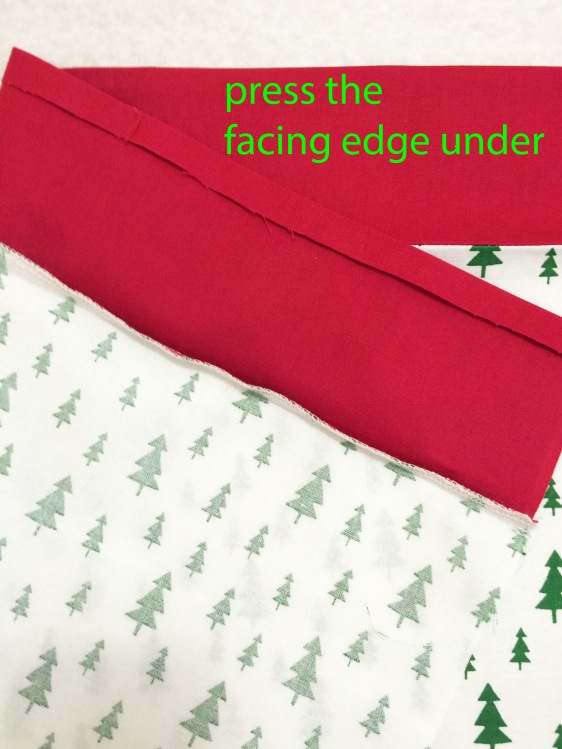 4/ Sew the bag together: fold the whole thing in half or if in two parts place together and stitch to form a bag along the sides and bottom. Overlock or use a zigzag stitch to finish the seams. Turn the bag out and press the seams flat.
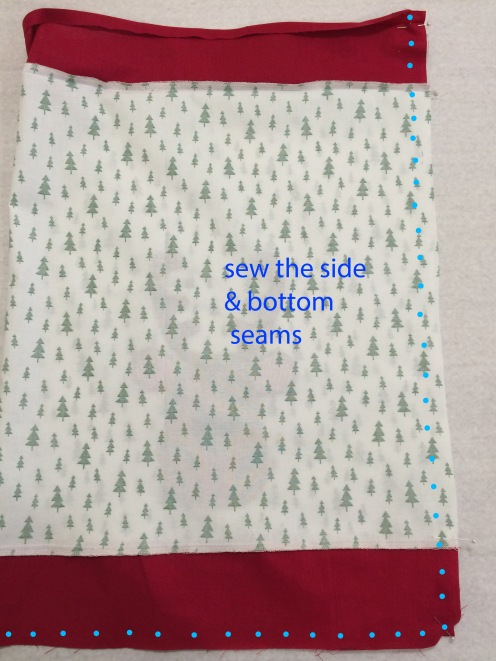 5/ Stitch the facing down: fold the facing to the inside; this should be easy because you have already pressed it under before stitching the bag seams. Press the facing flat, pin to hold and stitch the edge down.
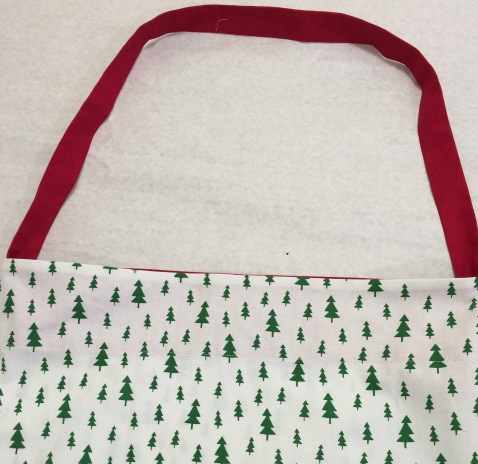
 Turn out and give a final press. 6/ Make the fabric tie: I cut my tie 90cm X 8cm [ 36″ X 3″]. It can be any width or length depending on how large a bow when tied up. Make the tie in the same way as for a belt or strap. Fold the tie in half and stitch with a very narrow seam, leaving a small gap at the centre to turn through. Turn out and press.
 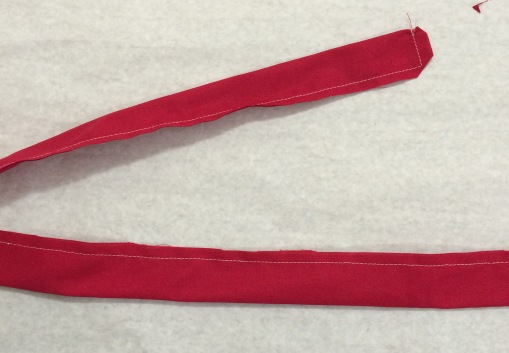 Stitch the centre of the tie to the side seam level with the bottom edge of the facing.
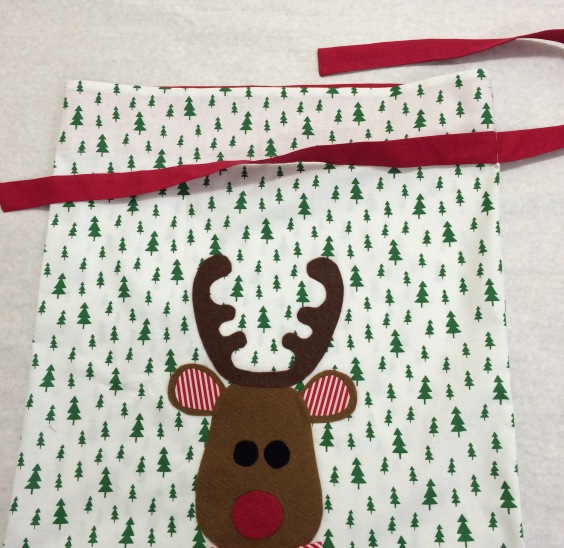 Alternately use a handle or loop to hang the Santa Sacks up.
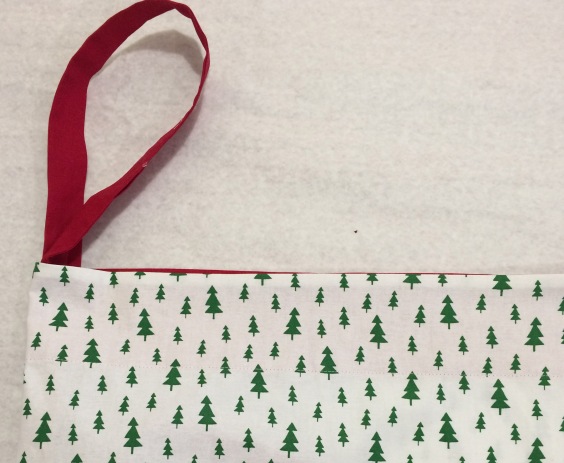
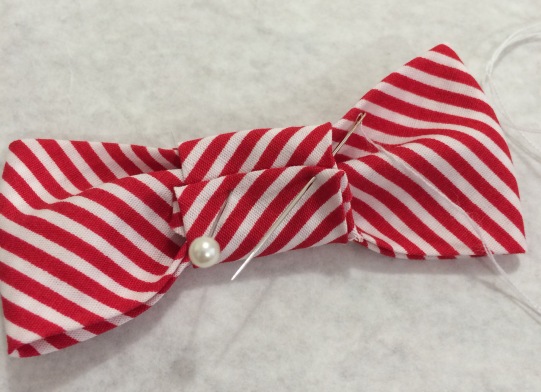
 Stitch on Rudolph’s bowtie and it’s finished.
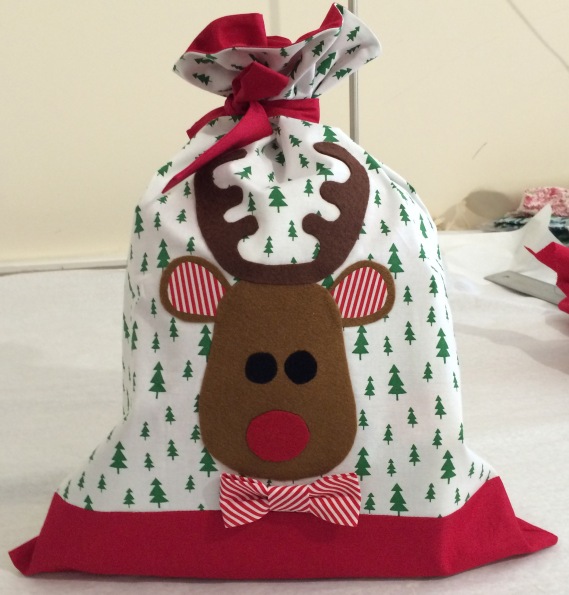 Below are two finished bags made in the same way but in different sizes and with wider borders and larger bow ties. The left hand sack does not have a separate contrast facing but I have cut the main bag section long enough to include a deep 7cm/3″ hem.
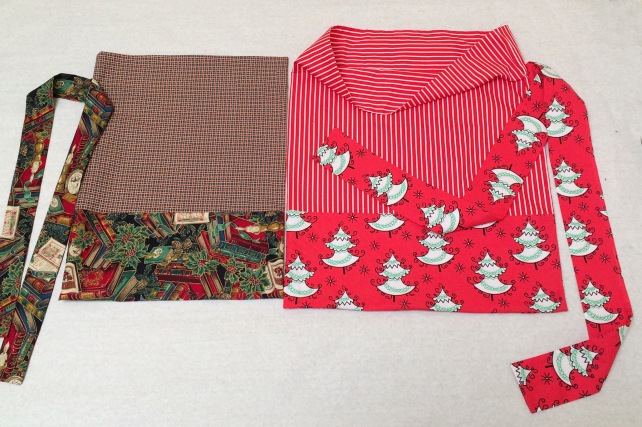 MERRY CHRISTMAS!

This is just too cute! My kids would adore the Rudolph appliquéd version. 🙂
LikeLike